What Is Gravatar?
First of all, what is an “avatar”? It is a little picture of yourself that appears next to your name when you interact with websites. You can see this little image in blog comments, forums and social media sites. In the past, you had to upload this “avatar” to each of the sites you were interacting with, but nowadays, Gravatar is widely used.

Your Gravatar is an image that follows you from site to site appearing beside your name when you do things like comment or post on a blog. Avatars help identify your posts on blogs and web forums, so why not on any site?
A GRavatar is a Globally Recognized “avatar”. You just have to upload your “avatar” once and link one or more email addresses to it in Gravatar.com. After you have done that, your “avatar” will show in all Gravatar enabled sites you interact with when you use the email addresses linked to it. If you comment in a blog post, your Gravatar will show, if you blog yourself, it will show for each post automatically.
How to Create your Gravatar?
1) Step 1
Go to Gravatar.com and click the Create Your Own Avatar blue button (See image above). You will be directed to a sign-up page like the image below.

Enter the main email address you will use with Gravatar, a username and a password.
2) Step 2
You will see a message like this telling you to confirm your email adress. Go to your inbox and click on the link provided in the message.
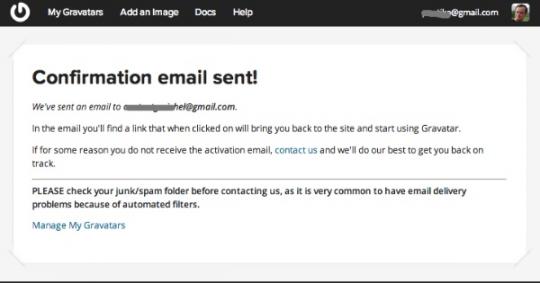
Each time you add a new email address in Gravatar you will see this screen and will have to confirm the new email.
3) Step 3
Click on the Add an Image button on the top menu. Select one of the three options below. If the image is on your computer, click the first blue button.

You can upload any size image file from your hard drive. Gravatar will automatically resize large images so you may upload the best quality version you have. You will also have a chance to crop the image.
4) Step 4
In your account you should only have one email registered when you start and it should be blue. Also, you should have only one image showing. You have to click on the image and a pop-up will show for you to confirm your choice. Click “Confirm”.

You can see in the image above that I have added a few images and that I have connected all my emails to only one image.
5) Optional
If you want to add other email addresses, hover your mouse on the small image at the top left and select “Add an Email Address”. Then, add your new email address, confirm it in clicking the link in the message you will receive from Gravatar. Lastly, connect the new email to one image as explained above.

Now that you know how to set-up your Gravatar, have fun!
Michel Gerard